 ID to Wallet
How to Scan an ID into Apple Wallet
Published · Reviewed · By the ID to Wallet team
To scan an ID into Apple Wallet you need an app that turns the scan into a Wallet pass. The Wallet app's own scanner only takes official IDs from the US states Apple supports and US passports.
With ID to Wallet, our iPhone app, you choose the document type, hold your iPhone over the card, check the details it reads and tap Add to Apple Wallet. The pass is a personal copy for convenience, not an official ID.
Before you start
- An iPhone with iOS 17 or later, and ID to Wallet from the App Store. Your first document is free and you need no account.
- The card on a plain, darker surface, filling most of the frame.
- Even light. Reflections from a lamp or window are what most often stop the photo from taking itself.
- An internet connection for the last step, because our server signs every Wallet pass.
Step 1: scan the front
Tap Add Document (the + button) and choose the kind of document: an ID card or licence, or a passport photo page.
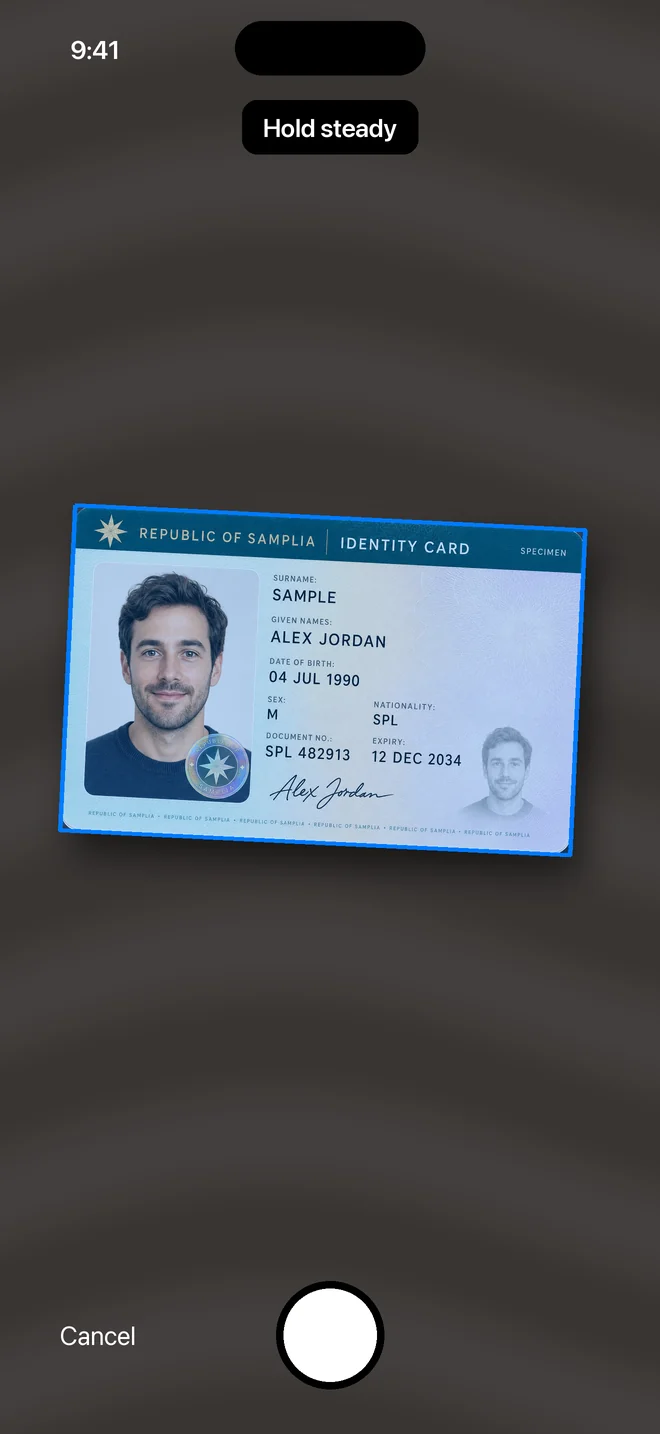
Hold your iPhone over the card. A blue outline finds it, and the photo takes itself once the card is steady, in focus and free of glare. If there's glare, the app asks you to tilt the card slightly.
You can also press the shutter yourself, or choose a photo you already have from Photos. Either way the image is straightened and cropped to the card on your iPhone.
Step 2: scan the back
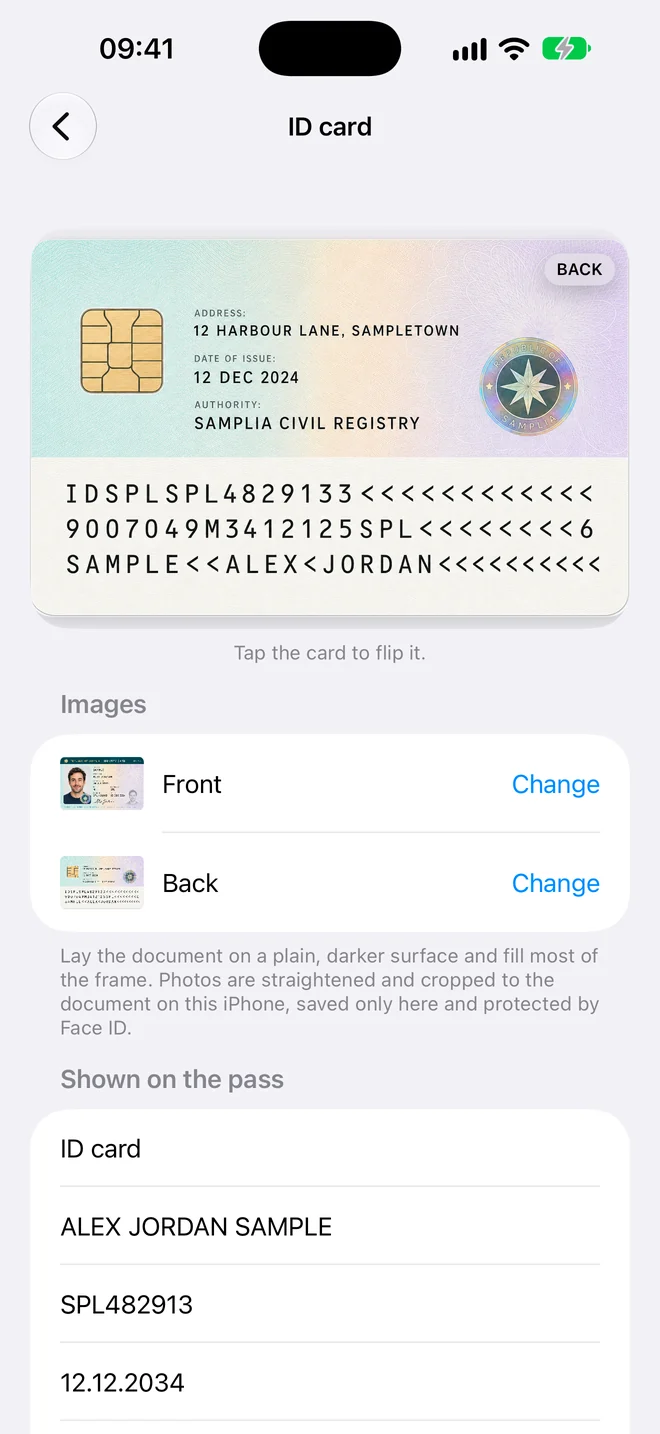
For an ID card or licence, scan the back the same way. Many ID cards carry their machine-readable lines (the rows of letters and <<< signs) on the back, so this is often where the name, number and dates come from.
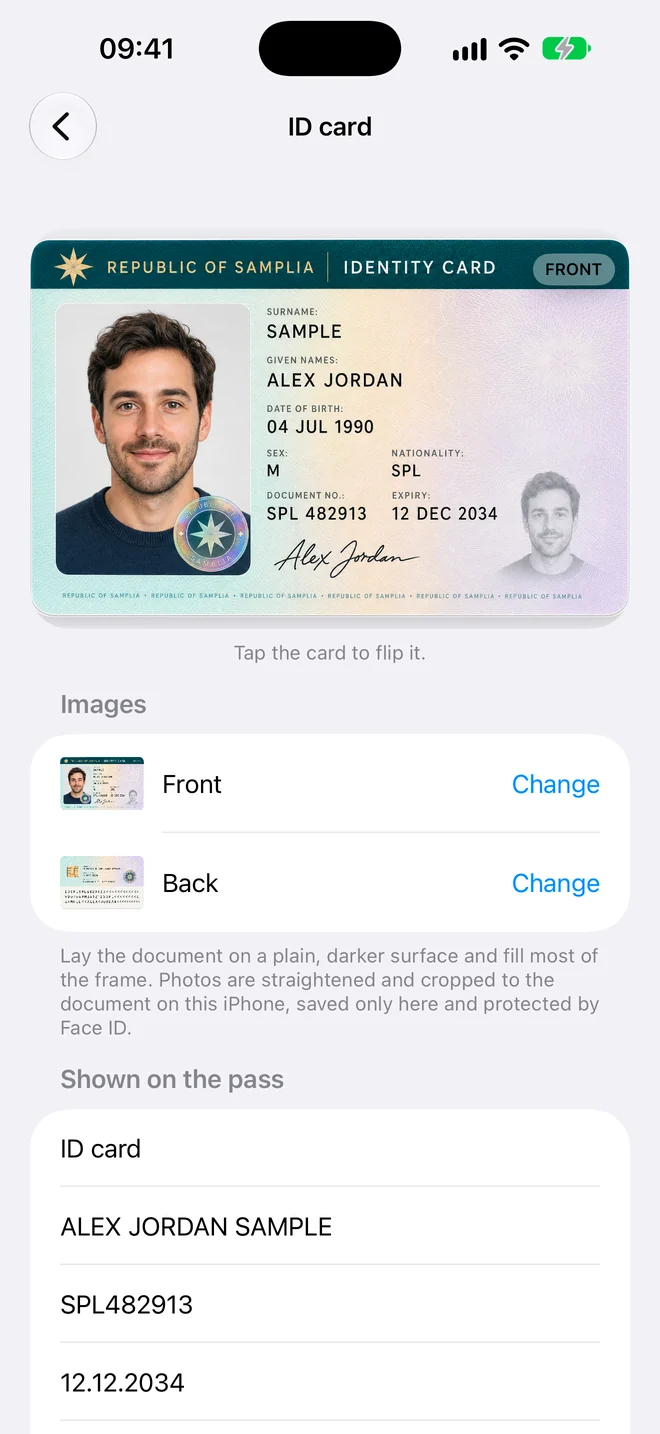
A passport needs only its photo page. Tap the card in the app at any time to flip between front and back.
Step 3: check the details
The app fills in the fields it can read on your iPhone. It reads them from:
- The machine-readable lines on passports, most ID cards and residence permits.
- The barcode on US and Canadian driver's licenses.
- The numbered fields on EU driving licences.
- Printed labels in English and Spanish, on a best-effort basis.
Check every field and edit anything that's wrong. Give the card a name, such as "Romanian ID", so you can tell your passes apart.
Step 4: add the pass to Apple Wallet
Pick the pass colour. By default it matches your card, and the text on the pass turns white or black to stay readable.
Tap Add to Apple Wallet, then Add in the sheet iPhone shows you. The pass appears in Wallet next to your other cards and passes.
What you'll see in Apple Wallet
The pass shows the front of your document with your name, number and dates.
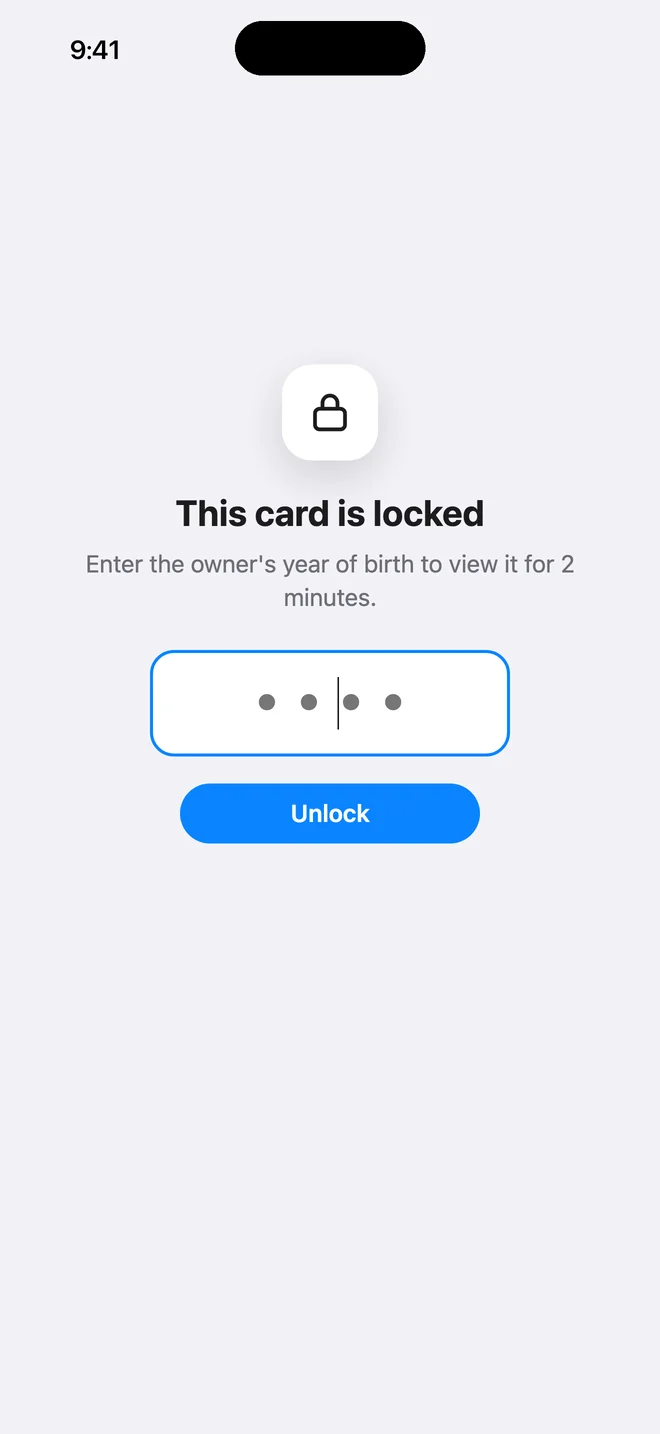
Its QR code opens both sides of the card and every detail, after the person scanning it enters your code. The card stays on their screen for 2 minutes, and five wrong tries lock it for 15 minutes. The code is your year of birth by default; change it in the app to 4 to 8 digits only you know.
"Open in the app" in the pass details takes you back to the document in ID to Wallet.
Updating or removing the pass
- Changed a detail or the colour? Edit it in the app and add the pass again. The new pass replaces the old one.
- Deleting the document in the app also deletes the encrypted copy behind the QR code. Remove the pass from Apple Wallet as you would any other pass.
- The copy behind the QR code is also deleted when the document expires.
If the details don't fill in
- Scan again on a darker surface, closer, with the card filling most of the frame.
- Some cards have no machine-readable lines, or a format the app doesn't read yet, such as the older Romanian identity card. Scan the card anyway and type the details.
- To see whether a card's machine-readable lines are valid, paste them into our free MRZ checker.
Check a passport or ID card's machine-readable lines with the free MRZ checker
What the pass is and isn't
It's a personal copy that keeps your card's details one tap away, for forms, bookings and checking an expiry date.
It isn't issued by a government and isn't accepted as ID at airports, by police or in shops. Keep carrying the original.
Where Apple Wallet supports an official ID, and how to add one
Questions
Can I scan both sides of an ID card?
Yes. ID to Wallet keeps the front and the back. The Wallet pass shows the front, and its QR code and the app show both sides.
Can I use a photo I already took?
Yes. Choose it from Photos instead of using the camera. The app straightens and crops it to the card the same way.
Does it work without internet?
Partly. Scanning and reading the details happen on your iPhone. Adding the pass needs a connection, because our server signs each Wallet pass.
Which documents can I scan?
ID cards, driving licences, passport photo pages and residence permits from any country. Where the app can't read a card, you type the details.
Sources
- ID to Wallet on the App Store
- ID to Wallet privacy policy
- Apple: IDs in Apple Wallet (official IDs and supported states)
Related
Scan your ID into Apple Wallet
Scan it, check the details, add it to Wallet.